
Unable to Find the Netgear Range Extender Network Name (SSID)? Fix it!
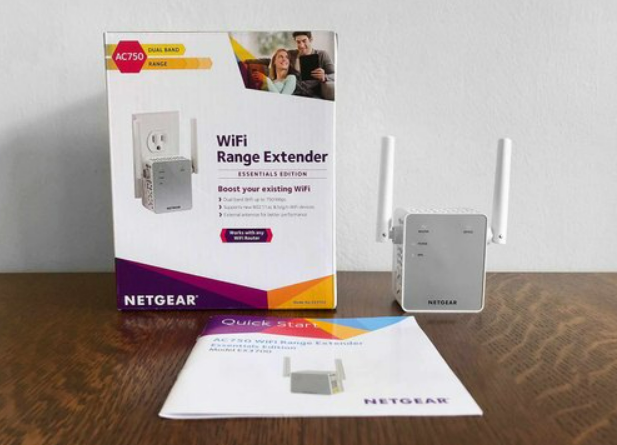
The Netgear Range Extender is the best way to boost up the speed of the existing wireless router’s range with combined signal strength. Simply plug the wireless extender into the wall outlet and then place it in the middle of the poor wifi network zone and the host router. With the help of 300 Mbps of speed, it can access each and every corner of the house with enhanced wifi coverage speed. Along with its dual-range external antennas that provide you with better networking coverage throughout the house.
Also, you can add more than one wireless extender to the host router’s network. Along with the setup of the Netgear wireless device, the mywifiext login is also a breeze. As long as it is the most compatible device in the market that can run with any wifi router. In addition, the Netgear wifi extender provides breakthrough performance that helps to expand the wireless network throughout the house. It also allows you to roam anywhere around in the house without dropping a single range of the internet connection.
Fixing the problems or the issues of the Netgear Range Extender
No doubt, the Netgear range extender is one of the great extenders that help to extend the wifi connection throughout the connected area. Also, it takes care of the dead or the weak spots that you may have in the area of the wifi coverage and lets you eliminate them. Well, it is a great way to improve the reach of the internet connection and replace your existing system with new facilitated technology. Moreover, you can place the Netgear device into your large offices as well. As it simply helps you to extend the internet connectivity with better overall wifi speed. Thus, you may have read about the features of the Netgear extender, but here we’ll assist you to fix the issues or problems with the wireless device.
Also Read – Electric Kettle Black Friday 2021 & Cyber Monday 2021
Why does the Netgear Genie appear on other networking pages while it is connected to the Extender network?
So you are facing a problem with the Netgear genie when it connects to the extender’s network but still, it appears on another networking web page. Well, this happens when you do not follow the configuration process properly. Or sometimes the disconnection of the extender with the router’s network can also be the reason for this error. In order to fix this issue, you can perform the network power cycle by rebooting the power of the extender and the main wifi router. Then reconnect the Netgear extender with the default wifi network connection. Now simply open the internet browser and restart the Netgear setup wizard process.
In case, the issue or the problem does not resolve then you can reset the default settings of the Netgear range extender. You can also clear the cache or the web history. Once the Netgear extender is successfully configured and installed then close the web browser and relocate the device to an optimum location.
Unable to complete the backup and restore of the Netgear wifi extender!
So you couldn’t complete the backup and restore of the Netgear wireless extender. Let’s instantly fix it. You can use the backup settings in order to create the backup file of the current extender settings. Along with that, the backup file contains all the current or past settings of the device such as password, access schedule, etc. If you know that your backup files are already saved into the computer device that can be used to restore the settings if the extender does not reset into the factory defaults.
In order to create the backup of the current settings
So to save the current settings, open the Netgear genie into an internet portal by typing mywifiext.net or the default IP address 192.168.1.250 into the location bar. When you are redirected to the login page then use your username and the wifi password to get access to the Netgear home page. Once you are on the Netgear extender home page then simply click on the settings and then tap on another. Thus, the page opens the other settings page. Now simply tap on the backup button and save the current settings of the Netgear extender.
In order to restore the settings of the wireless range extender
To restore the settings of the Netgear wireless range extender from the saved file into the computer device. So simply go to the page of other settings and then tap on the browser button and in the submenus you need to click on the restore button. After that navigate the location where you want to save the file into the computer. Then save the location with a specific name. Hence, tap on the restore button and save all the restore settings.
Must Read – Role of A Book’s Cover in Marketing
Failed to find the network name (SSID) of the Netgear wifi range extender?
Well, this section will assist you to find out the Network name of the wifi extender. Usually, this happens when the range extender fails to broadcast the network name or the device does not boot up appropriately. Simply try to reboot the range extender and then try to make the connection again. If the error still continues then you need to check if the device is broadcasting its network name or not.
To connect the PC with the range extender by using an ethernet cable. Hereafter open the user interface into a secure web browser by using mywifiext.net. By clicking on the enter button, you’ll be redirected to the login page and it will ask you for the username and the default password. Well, by default the username is admin and the wifi password is password. In case these credentials do not work then you might have changed the credentials. So try to log in with your new details.
After login, go to the wifi settings and check for the 2.4 GHz wifi or 5 GHz wifi connection. Also, enable the wifi network name by broadcasting it and by enabling save the settings. So this is how you can find the network name (SSID) of the Netgear range extender.


